

How to Do a Chest Supported Row: Form, Muscles Worked, and Alternatives
An appealing physique requires having a powerful back, so establishing an exercise program to strengthen and thicken your back muscles. A chest-supported row is one effective exercise to do in this respect.

At first, Pilates can seem intimidating due to all the equipment necessary. With proper guidance and knowledge, however, it is one of the best back exercises because it isolates your back muscles as no other movement can.
The write-up will teach you everything there is to know about chest-supported rows and help alleviate any confusion that might be holding you back from building the back of your dreams. So continue reading until the very end if that's your goal!
What is a Chest Supported Row?
Exercise that trains your mid, upper back and rear delts and can also assist those suffering with shoulder issues or face pain when performing overhead presses. Rowing-like motion is key for this exercise - much like sailing a boat!
An inclined bench is essential to this exercise as it provides the optimal position for strengthening back muscles you wish to target. However, if this option is unavailable to you, propping up a flat bench on a box may provide sufficient angles
Chest Supported Row Form & Technique
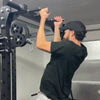
How to Do a Chest Supported Row?

Step 1: Adjust an inclined bench between 30-45deg for optimal results.
Step 2: Lay on the bar with legs extended straight and head hanging while maintaining a neutral neck position.
Step 3: Row arms toward your ribcage until lats and midback muscles have fully contracted.
Step 4: Once fully contracted, take a momentary pause in that position and squeeze your shoulder blades tightly together.
Chest Supported Row Common Mistakes to Avoid
Misusing Excessive Weight
Many athletes make the mistake of lifting too much weight, leading them to use momentum rather than lifting to target specific muscles. To avoid making this error, start with an appropriate weight for your body and aim to complete 8-12 reps of that exercise session.
Flaring of Elbows
Rows are intended to target mid and upper back muscles with lats. Flaring of elbows puts unnecessary strain on shoulders, potentially leading to injuries. Be mindful to keep them close to your body in order to engage your target muscles effectively.
Squeezing Shoulder Blades Insufficiently
Not squeezing shoulder blades enough can limit muscle penetration and limit results, hindering proper posture alignment for many people. Make sure you're squeezing them during movement to engage as many rhomboids as possible and get maximum benefit out of each exercise session.
Lifting Your Chest
In order to create an effective row exercise, only arm movements need be performed. Any time your chest rises off of the bench it could potentially strain or injure your lower back; additionally, lifting can prevent you from targeting specific muscle groups.
Be sure to press your chest firmly against the bench throughout your exercise, to make sure that you target mid back and lats muscles without exacerbating lower back strain. This will allow for optimal targeting of mid back and lats while limiting any lower back exertion.
Limit of Motion
Exercises such as chest supported row can only deliver maximum benefits when their entire range of motion is utilized; people often become lax during this movement and try pushing only part way, leading to ineffective movements and reduced results. For optimal results, make sure that at both the bottom end of movement your arms fully lowered while simultaneously tightening shoulders on top for optimum results.
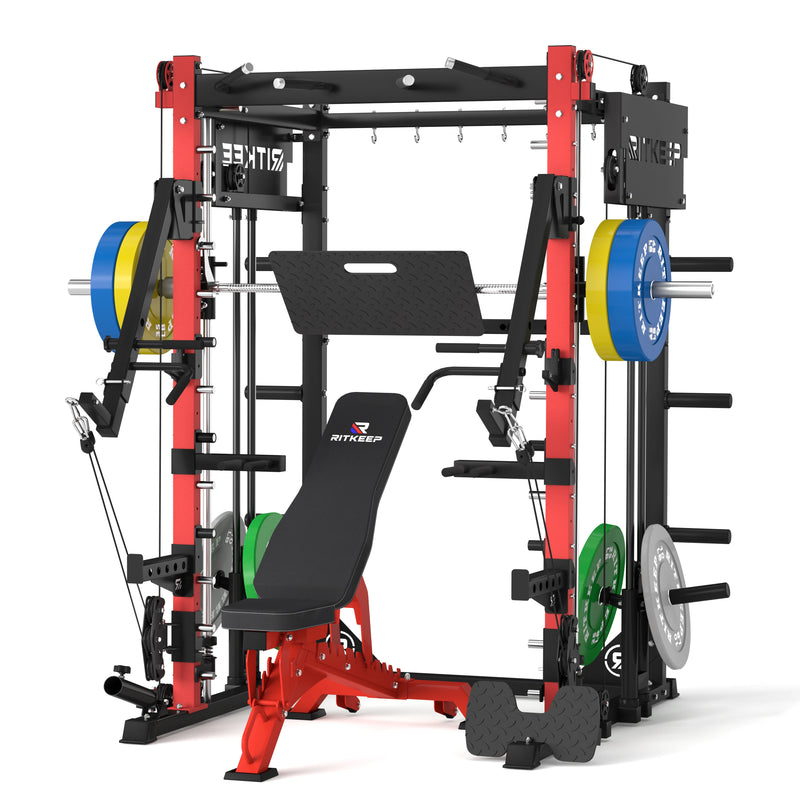
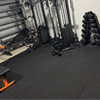
PMAX 4750 Dual Plate Loaded Multi Functional Smith Machine |
PMAX-5600 Black Multi Functional Smith Machine |
 |
 |
Benefits of Chest Supported Row

Isolates Back Muscles for Greater Activation
Moving the upper body often engages muscles we don't intend to engage, which is fine when performing athletic activities; but if our goal is to increase growth and activation in our back, isolating these muscles may be beneficial.
A chest supported row is an effective exercise for accomplishing this. As you lie on an inclined bench and squeeze your shoulder blades together on top, your back gets isolated while its muscles experience heat from movement.
No Lower Back Stress
Many back exercises require you to maintain lower back stability, such as standing rows or deadlifts, which can put you at risk of injury and pain that could interfere with your workouts in various ways. One effective solution to avoid this issue is adding rowing to your fitness regime.
Correctly executed, arm and back strength exercises only involve your arms and back; no other part of your body is involved, thus decreasing any risk for lower back pain by completely taking it out of the equation.
Train to Failure
Exercises such as bent-over rows can be powerfully effective; however, their extensive involvement of multiple muscles makes maintaining proper form challenging and exhaustion may make maintaining it all the harder. As fatigue sets in, keeping to proper form becomes harder and harder until eventually injuries may result.
Rowing provides the solution by supporting your body on a bench, enabling you to train until failure without worrying about fatigued muscles other than those intended to be worked.
As Rowers Lack Pulling Power
Rowing might eliminate body motion, but that doesn't preclude you from lifting heavier weights. When doing other back exercises such as deadlifts or rows, such as forcing weight onto your core and stabilizing muscles to perform a pulling movement.
Chest supported rows can help generate force without using other muscle groups; they allow your muscles to lift more weight without straining any other group.
Chest Supported Row Variations
Chest Supported Incline Row

Step 1: Adjust a bench at 30-45 degree angles and lie flat on it with legs on either side, stretching them out flat along its surface.
Step 2: Push through your arms without moving any other body part.
Step 3: Make sure your arms reach above your rib cage, with tightened shoulder blades.
Step 4: After rising slowly and repeating this movement for as long as needed, make your descent. Your set will eventually be completely utilized.
Chest Supported Dumbbell Row

Step 1: Grab two dumbbells in both hands and lie on a bench inclined at 30-45deg, keeping your body flat with legs spread apart on either side.
Step 2: Lift arms above rib cage. Squeeze shoulder blades during this movement for optimal results.
Step 3: Carefully lower the dumbbells back down until they have completed one rep and complete your rep set.
Chest Supported Barbell Row

Step 1: Begin by lying on an inclined bench set at 30-45deg while holding onto a barbell. Press your chest against the bench, while your legs lie either side of you.
Step 2: Pull through your arms towards your back as far as possible. While it won't be as effective, try and squeeze as hard as you can with dumbbells!
Step 3: After holding for several seconds at the peak of movement, bring down the barbell slowly to complete one repetition before starting over and beginning anew.
Chest Supported T-Bar Row

Step 1: Begin by lying on a bench and gripping both t-bar handles using an overhand grip, keeping your hands closer if you wish to target lats and wider for upper back exercises.
Step 2: Pull your elbows towards your back while pressing your chest into it.
Step 3: Keep movements under control and slowly bring the T-bar up and down.
Step 4: Once finished with your reps, instead of dropping the T-bar onto the floor it should be rested at its resting point instead.
Bearing Olympic Powerlifting Barbell |
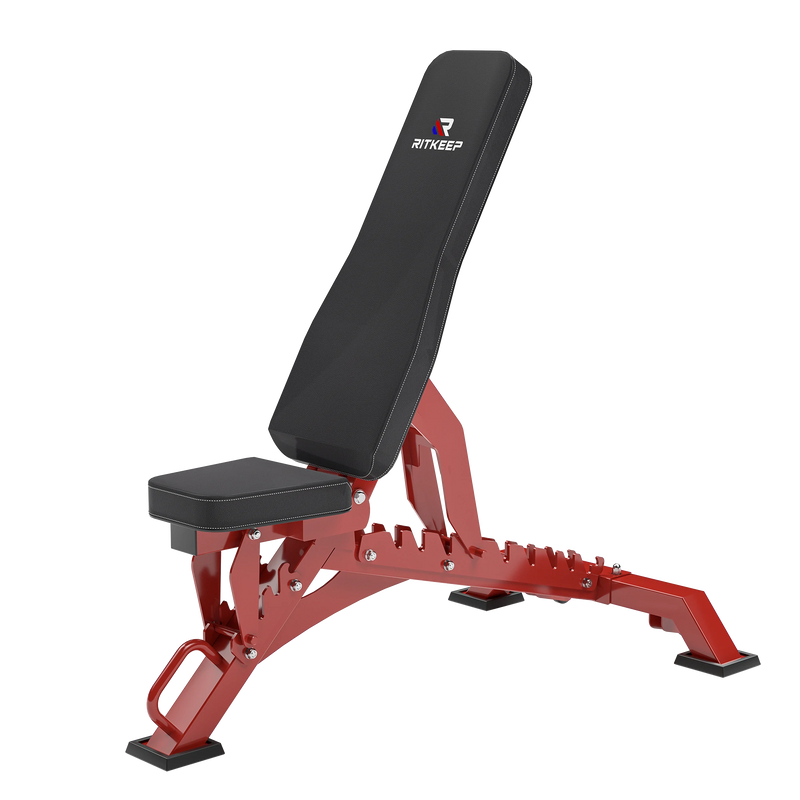
RAB-3000 Adjustable Inlcine Training Weight Bench |
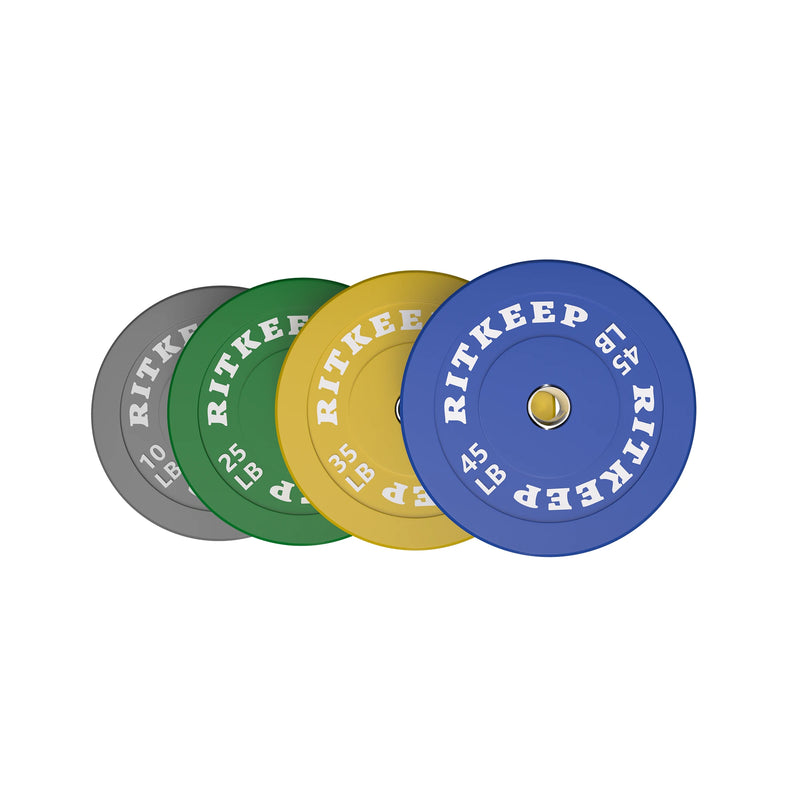
Olympic Low Bounce Rubber Weight Plates |
 |
   |
 |
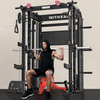
Chest Supported Machine Row

Step 1: Sit comfortably on the machine with legs on either side.
Step 2: Grab both handles with both hands, pulling back with full force but gradually.
Step 3: Your back should be arched and your chest upright when at the peak of movement. Squeeze well for maximum benefit from this exercise.
Chest Supported Rear Delt Row

Step 1: Sit flat on a bench with both legs on either side.
Step 2: Since this movement focuses on rear delts, start from the center and pull through your elbows to maximize results.
Step 3: Lift as high as possible while pressing down onto your shoulder blades at the same time.
Step 4: Control the movement carefully and gradually step down from your position.
Chest Supported Row Alternatives
Some may not enjoy rowing for various reasons - from not having the appropriate equipment to simply not preferring it altogether. Let's look at some alternatives you could try instead of rowing.
Seated Bent Over Row
To perform the Seated Bent-Over Row properly, all that's necessary is a narrow surface on which to sit and dumbbells in both hands. Here's how this movement should be carried out correctly:
Step 1: seated Bent Over Row
To begin this technique, sit comfortably on either a bench or chair while positioning dumbbells by your sides on the floor.
Step 2: Grab both dumbbells while keeping your back straight, tilting your upper body backward and keeping your arms stretched to move the dumbbells farther from the ground.
Step 3: Bend your elbows backward, until your hands reach your body. Focus this exercise on working the back muscles as this exercise's primary aim.
Single Arm Row
To perform the single arm row, all you need is one weight in hand (such as a kettlebell, dumbbell or cable machine) and somewhere knee-high to sit. Here is how this movement should take place:
Step 1: Sit on a bench with your weight in one hand and begin.
Step 2: Bend and place one leg's knee onto a bench, also resting its hand on that side of the bench.
Step 3: Bend the elbow of the arm holding the weight and squeeze with that arm to exert back muscles; be mindful of connecting mind-muscle connections for maximum impact.
One advantage of this exercise is that it allows you to focus on one side at a time, avoiding muscle imbalances. Unfortunately, however, this method requires more time.
Smith Machine Lat Pulldowns

Lat pulldowns should be performed while sitting on a seat fitted with two pads to hold your legs securely and prevent yourself from pulling up while performing this exercise. Here is how this movement should be executed:
Step 1: Sit on the seat with your legs underneath the anchors and select an appropriate weight for Lat Pulldowns.
Step 2: Grab the handles with palms facing downwards and lean back slightly.
Step 3: Slowly pull the bar down until it reaches your chest, and squeeze your shoulder blades together to complete this exercise.
RitKeep 5pcs Lat Pull Down Bar Combo |
RitKeep Pull Up Assist Band Set Premium Resistance |
All In One Adjustable Weight Dumbbells |
 |
 |
 |
Chest Supported Row FAQs (Frequently Asked Questions)
Q: Can beginners perform chest supported rows?
Absolutely, beginners can perform rows using correct technique and form. They should always select an appropriate weight or learn the movement without using weight first to ensure success. Having an instructor or friend guide them when performing this movement to prevent mistakes would also be advantageous.
Q: When should I do chest supported rows?
To get the most benefit out of chest supported rows as an upper back exercise, add this exercise into your back day routine. For push-pull legs routines or full body workouts that involve this exercise twice or thrice weekly repetition is best.
Q: For my chest supported row workout, what are the necessary sets and reps?
Here is a basic breakdown depending on your goals:
Muscle endurance requires three or four sets of 10-15 reps with lighter weights, followed by breaks of 2-3 minutes in between sets.
Muscle Strength: 3-4 sets of 10-12 reps using heavy weights with two to three minute breaks between sets.
For muscle growth: Complete three to four sets of six to ten reps using the heaviest weight possible while taking 2 or 3 minute breaks between each set.
Q: How should I choose my weight for chest supported rows?
Your ideal weight depends entirely upon your experience and strength levels. Beginners may benefit from using lighter weights initially while learning the movement; as they gain strength & experience they can gradually increase it as necessary.
Q: How can I add chest-supported rows into my training program?
Here are a few pointers on incorporating chest supported rows into your regimen:
Always ensure a sturdy machine is used, adjusted according to your height, with sufficient padding, to prevent mishaps from occurring during exercise. Warm up before beginning any workout by choosing an appropriate weight. Keep movements slow and controlled throughout, with particular attention paid towards back muscle work.
Q:How can I increase and make chest supported rows more challenging?
One way of increasing their difficulty is through increasing the reps and sets, but for maximum resistance add heavier weight to this exercise instead - giving more resistance without spending additional time doing additional reps and sets.
Summary
For optimal back strengthening and muscle development, few exercises can surpass the chest supported row. One key advantage is its focus on targeting just your back muscles - without overexerting other body muscles to support it. Of course, any form and technique employed while performing an exercise will also determine its success.
Make sure that you set the bench at an optimal angle and lift weights your body can support. Seek help from friends or trainers in order to gain maximum benefits from chest-supported rows, building the back you have always desired.
