Incline Bench Press Mastery: Your 5-Step Blueprint for a Powerful Upper Chest
Are you tirelessly pushing weight on the flat bench? Yet your upper chest remains frustratingly flat, lacking the full, shelf-like appearance that defines a powerful physique. You're putting in the effort, but what if the key isn't working harder, but working smarter? The truth is, many lifters overlook the single most effective tool for upper chest development: the incline bench press. Research indicates that an incorrect bench angle can significantly redirect tension away from your chest and onto your vulnerable shoulders¹, sabotaging your gains and inviting injury. This isn't just another exercise; it's a targeted strategy. This definitive guide delivers your exact 5-step blueprint to master the incline bench press. You will discover the science-backed perfect angle, execute flawless form to avoid common pitfalls, and learn how to integrate this lift to finally build the complete, imposing chest you deserve.

Part 1: Why Your Chest is Incomplete Without the Incline Press
The plateau in your chest development isn't from a lack of effort—it’s an anatomical blind spot. Your pectoralis major has distinct upper, middle, and lower fibers. Traditional flat bench pressing primarily builds the middle and lower regions, often leaving the crucial upper fibers (the clavicular head) underdeveloped and weak. This creates a chest that looks “bottom-heavy” and lacks the rounded, armor-like fullness from the collarbone down.
The incline bench press is the definitive solution. By adjusting the bench to an angle, you align the line of force with the natural pull of your upper chest fibers. This allows for direct, overloadable tension exactly where you need it. Think of it as sharpening the peak of a mountain; the incline press sculpts the defining contours of your chest, while the flat bench builds the broad base.
The Functional Power: Beyond Aesthetics
A strong upper chest is more than visual; it's foundational for shoulder health, posture, and athletic performance. It balances the muscles around your shoulder joint, counteracting the hunched posture from daily life and heavy pulling exercises. It also provides essential strength for any pushing motion that isn't perfectly horizontal, from throwing a ball to pressing an object overhead.
The Science: Finding the Sweet Spot
Research consistently points to a 30 to 45-degree bench incline as the optimal range². This angle maximizes activation in the upper pectorals while minimizing excessive strain on the front deltoids. An angle steeper than 45 degrees transforms the movement into more of a shoulder press, shifting the emphasis away from your chest. For most lifters, starting at 30 degrees provides the perfect balance of targeted tension and joint safety.
Pro Tip: Self-Test Your Angle
Not sure what’s best for you? Before loading weight, try this: Set the bench to 30 degrees and then 45 degrees. Using just the bar or very light dumbbells, perform a few slow reps at each angle. Focus on where you feel the greatest stretch and contraction in your upper chest. That’s your personalized starting point.
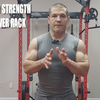
Part 2: The 5-Step Master Blueprint for Flawless Incline Press Form
Precision in every phase of this lift separates productive training from wasted effort and potential injury. Follow this sequence meticulously. (Visual learners: each step below corresponds to a key frame in a proper form video or diagram.)
Step 1: The Non-Negotiable Setup—The Core: A Stable Platform
Key Actions: Set the bench to a 30-degree incline (or your self-tested angle). Plant your feet firmly, eyes under the bar.
Make-or-Break Detail: Before touching the weight, retract and depress your shoulder blades—imagine tucking them into your back pockets. Maintain this tight “platform” throughout the entire set.
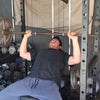
Step 2: Grip and Unrack with Intent—The Core: Controlled Liftoff
Key Actions: Take a grip slightly wider than shoulder-width (forearms vertical at the bottom). (See illustration)
Make-or-Break Detail: Take a deep breath, brace your core, and use leg drive to unrack the bar with control. Hold it steady above your upper chest/clavicle.
Step 3: The Loaded Descent—The Core: Elbow Path
Key Actions: Lower the bar with control in a slight backward arc toward your upper chest.
Make-or-Break Detail: Keep your elbows at a 45 to 60-degree angle to your torso. Never flare them out to 90 degrees. Gently touch the bar 1-2 inches below your clavicle.
Step 4: The Powerful Press—The Core: Mind-Muscle Connection
Key Actions: Press the bar back along the same arc.
Make-or-Break Detail: Consciously drive with your chest, imagining you're bending the bar. Squeeze your chest hard for a one-count at the top.
Step 5: The Powerful Finish—The Core: Secure Racking
Key Actions: After your final rep, guide the bar back to the hooks.
Make-or-Break Detail: Do not release your grip until you hear and feel the bar securely racked.
Part 3: The Priority: Smart Adjustments for Shoulder Health
If you have a history of shoulder discomfort or feel a pinch in the front of your shoulder during the barbell press, don't force it. Your shoulder's feedback is paramount.
The Shoulder-Sensitive Lifter's Priority:
- Choose Dumbbells First: The dumbbell variation (detailed next) is your best friend. The independent movement allows your wrists and shoulders to find a natural, comfortable path, significantly reducing joint stress compared to the fixed path of a barbell.
- Reduce the Incline: Start at a more modest 15-20 degree angle. This further decreases shoulder strain while still effectively targeting the upper chest. Gradually increase the angle as your comfort and strength improve.
- Embrace the Stretch: Focus on the deep stretch at the bottom of the dumbbell press. This controlled stretch under light load can improve mobility and tissue quality over time.
Part 4: The Essential: Dumbbell Variation for Safety & Growth
The dumbbell incline bench press is a critical complement—or primary option—for balanced growth and shoulder safety:
- Greater Range of Motion: Achieves a deeper stretch at the bottom, stimulating more muscle fibers.
- Corrects Imbalances: Each side works independently, preventing your dominant side from compensating.
- Enhances Stability & Joint Freedom: Challenges your shoulder stabilizers and allows for natural rotation, building more resilient joints.
Execution: Set the bench to your chosen angle (start with 15-30 degrees if sensitive). Sit with dumbbells on your knees, use a leg swing to kick them into position at your shoulders, and press upward in unison. Lower them with control until you feel a deep stretch across your chest.
⚠️CRITICAL SAFETY NOTICE
Finishing the Set: To finish safely, bring your knees up to meet the dumbbells at your shoulders before sitting up, or carefully lower them to your torso and sit up.
Avoid This: Never drop heavy dumbbells directly to your sides—this is a common cause of shoulder and pec strains.
(A video guide is highly recommended for mastering this entire kick-up technique.)
Part 5: Critical Form Cues & Mistakes to Eliminate
🛡️YOUR NON-NEGOTIABLE SAFETY CHECKLIST
- Stay Grounded: Keep your glutes and upper back firmly on the bench. A slight arch is fine; lifting your hips is dangerous.
- Breathe and Brace: Use the Valsalva maneuver for heavy sets (i.e., take a deep breath into your belly and brace your core before descending, holding the breath to stabilize your spine through the hardest part, then exhaling on completion).
- Wrist Integrity: Keep wrists straight. The bar should rest in the heel of your palm, not bend your hands backward.
Common Form Killers (and Fixes):
- ❌ Mistake: Elbow Flaring. → ✅ Fix: Consciously think “elbows in.”
- ❌ Mistake: Bouncing the Bar. → ✅ Fix: Use a 2-1-2 tempo: 2 seconds down, 1-second pause, 2 seconds up.
- ❌ Mistake: Bar Path Too Straight. → ✅ Fix: Remember the slight arc; the bar should not travel in a straight vertical line.
- ❌ Mistake: Losing Back Tightness. → ✅ Fix: Reset your shoulder position before every single rep.
- ❌ Mistake: Ego Lifting. → ✅ Fix: Choose a weight that allows for 3 sets of 8-12 perfect reps before adding more.
Part 6: The Strategy: Programming for Maximum Growth
The incline press is a main lift, not an accessory. Program it strategically:
- Frequency: Include it in 1 of your 2 weekly chest sessions.
- Placement: Perform it first when you are freshest and strongest.
Sample Chest Day:
- Incline Barbell Press → 3 sets x 6-10 reps (Strength Focus)
- Flat Dumbbell Press → 3 sets x 8-12 reps (Volume Focus)
- Cable Flyes → 3 sets x 12-15 reps (Isolation/Pump)
Progression: Add 2.5-5 lbs (1-2.5 kg) only when you can complete all reps of all sets with perfect form.
Progression Tip: If adding weight plateaus, focus on increasing reps with perfect form first, then add weight and reset the reps.
Part 7: The Arsenal: Building a Complete Chest
- Horizontal Pressing (Flat Bench): Builds overall mass and raw strength.
- Stretch-Focused Movements (Dumbbell Flyes): Enhances mind-muscle connection and promotes growth through a full range.
- Lower Chest Emphasis (Dips/Decline Press): Develops the lower pectoral sweep for a balanced, 3D look.
Conclusion: Build Your Foundation, One Perfect Rep at a Time
Mastering the incline bench press is the master key to unlocking a powerful, complete chest. It transforms your training from guesswork into a precise science of angles, tension, and control. By applying this 5-step blueprint—prioritizing the optimal angle, impeccable setup, and disciplined form over ego—you will conquer the plateau and forge the upper chest that commands attention. Remember, quality and joint safety always trump quantity.
Now, take this blueprint into the gym. Start with your next set at a 30-degree incline, execute each rep with precision, and witness your upper chest transform from a stubborn weakness into a defining strength. Your journey to a stronger, more impressive physique starts with your next, perfectly executed rep.
References
- ResearchGate. (2025). Muscle Activation of Upper Body in Different-Angle Suspension Push-Ups.
- Applied Sciences. (2023). Electromyographic Activity of the Pectoralis Major Muscle during Traditional Bench Press.
- PubMed (2023). A Biomechanical Analysis of Wide, Medium, and Narrow Grip Width Effects.
- Research Square (2023). Joint Loading and Muscle Activation of Upper-body in Different Incline/Decline Push-Up Variants.

